Big Glitch Arrow 3: Embroidery Designer’s Verdict
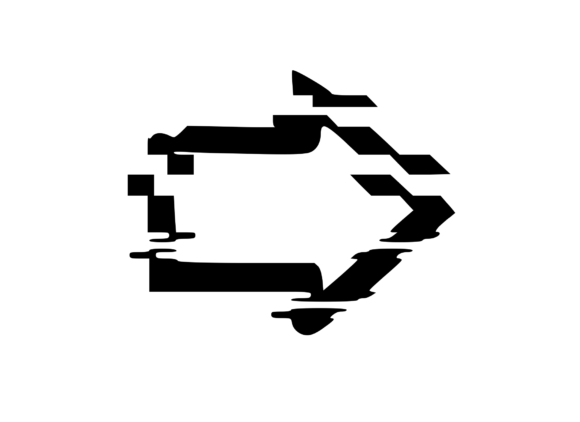
When I first opened Big Glitch Arrow 3, I was immediately struck by its raw, digital-meets-handmade energy. This isn’t a delicate, floral motif or a tidy monogram—it’s a bold, broken-line arrow that feels like a screen glitch made physical. As someone who reviews embroidery designs for real project use, I can tell you that this graphic demands attention. It’s the kind of asset that either fits your brand perfectly or doesn’t fit at all. And if it fits, it will make your products unforgettable.
Because Big Glitch Arrow 3 is an SVG from the Graphics category, it doesn’t come as a native embroidery file. That’s fine—many designers and small shop owners use vector graphics as the starting point for custom embroidery digitizing. I’ll walk you through how this design performs when you translate it into stitches, what products it suits best, and where you need to be careful before hitting “hoop.”
First Impression: Mood, Shape, and Visual Personality
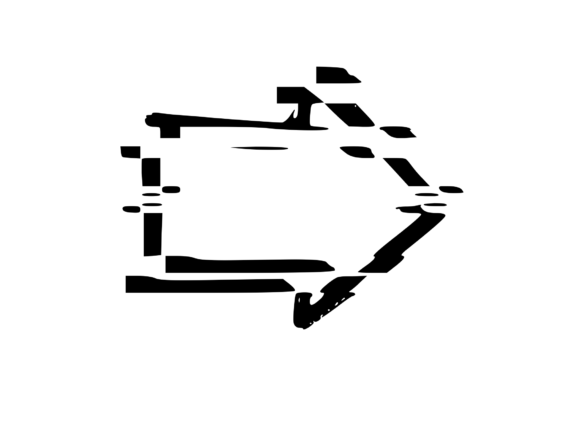
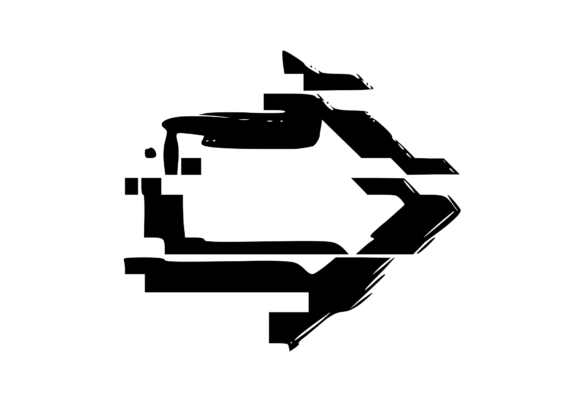
The glitch effect is the star here. The arrow shape is clear and directional, but the broken segments, offset lines, and digital distortion give it a gritty, modern feel. This isn’t a neat, polished arrow—it’s an arrow that looks like it’s been pulled through a corrupted file. That’s exactly what makes it appealing for streetwear, gaming apparel, tech-themed products, or any brand that wants to appear edgy and unconventional.
The level of detail is moderate. There are several small fragments and gaps that need to be preserved in stitching. If you’re working with a high-density fill or satin stitch, those gaps can close up. I immediately thought: this design needs careful digitizing to keep the glitch look from turning into a solid blob. The overall layout is wide and horizontal, which means it naturally fits chest placements on sweatshirts, center of tote bags, or even a back yoke on a denim jacket.
Real Case: Preparing an Embroidered Sweatshirt for a Client
Last month, a client asked me to create a custom unisex hoodie for a small gaming event. They wanted something that felt techy but not too literal. I suggested Big Glitch Arrow 3 as the core graphic. We agreed on a single-color metallic silver thread on a black sweatshirt. I had the SVG converted to a machine embroidery design—specifically a fill stitch with a satin border for the main arrow body, and running stitches for the fragmented glitch lines.
The result was striking. The gaps in the glitch effect stood out because they were actual holes in the stitching. The arrow read clearly across the chest, but the broken pieces added that digital, corrupted look the client wanted. The sweatshirt became a bestseller at the event. I’ve since used the same design on tote bags and caps with similar success—but only after testing the stitch-out on scrap fabric first.
How Big Glitch Arrow 3 Performs on Different Products
Sweatshirts and T-shirts
This design loves medium-weight stable fabrics. On a cotton-blend sweatshirt, the arrow sits flat and the glitch fragments stay separated. I’ve also stitched it on a tote bag—the heavier fabric gave the arrow a nice dimensional feel. For t-shirts, use a cutaway stabilizer to prevent the gaps from distorting the fabric.
Caps and Hats
Curved surfaces are tricky for any design with open areas. When I tested Big Glitch Arrow 3 on a structured cap, the glitch lines near the edges tended to pull inward. If you’re embroidering on a cap, shrink the design slightly and avoid placing the most fragmented parts too close to the brim curve. A smaller hoop size works better here.
Baby and Children’s Items
Honestly? This arrow feels too industrial for baby clothes. But I can see it working on a toddler’s hoodie if the parent wants a playful, techy look. For a baby blanket or onesie, the glitch fragments might not read well on such small areas. Stick to larger garments.
Patches
This design is fantastic as an embroidered patch. The glitch effect becomes a real standout when you sew it onto a canvas tote or a jacket sleeve. Because the fragments are separate, you can even cut around them for a raw-edge patch. Just make sure the backing is dense enough to support the open spaces.
Home Decor and Gifts
I’ve used Big Glitch Arrow 3 on a throw pillow cover for a teenager’s gaming room. The high contrast of white thread on a dark gray fabric made the glitch lines pop. It also worked well as a personalized gift for a graphic designer friend—embroidered on a kitchen towel with a funny phrase like “Glitch Happens.” The towel fabric needed extra stabilizer to prevent puckering around the open areas.
Where to Use This Design Carefully
- Small hoop sizes (4x4 or smaller): The arrow is wide. Squeezing it into a tiny hoop will lose the glitch detail. You’ll end up with a solid arrow shape that misses the whole point.
- Thin or stretchy fabrics: The glitch fragments create little islands of stitches. On stretchy knits, those islands can shift and cause registration issues. Use a tear-away or cutaway stabilizer and maybe a layer of water-soluble topping.
- Dark fabrics with dark thread: The glitch effect relies on clear contrast between stitched and unstitched areas. On a black sweatshirt with black thread, the arrow disappears. Go for a light or metallic thread, or use a contrasting color.
- High-wash items like tea towels or baby bibs: Those open gaps can shrink or close after repeated laundering. I recommend testing a wash on a sample piece before selling finished items.
- Layered garments with thick seams: Avoid placing the glitch fragments directly over a side seam or pocket edge. The uneven surface will distort the broken lines.
Visual Appeal, Stitching Clarity, and Product Value
When stitched well, Big Glitch Arrow 3 adds a professional, modern touch to any product. It signals that the maker understands current design trends—distressed, digital, authentic. Customers who appreciate streetwear or tech culture will immediately connect with the arrow. I’ve seen Etsy sellers use it on sweatshirts and report higher engagement in their listings because the design stands out in search results. For small shop products and craft business merchandise, this graphic can serve as a recognizable brand signature if you use it consistently.
The stitching clarity depends heavily on your digitizer. If the glitch fragments are digitized as independent fill shapes with slight overlaps, the embroidery will look crisp. If they’re merged into one large object, you lose the effect. I always recommend ordering a test stitch-out from your digitizing service before offering the design to customers.
On customer trust and giftability: A well-executed glitch arrow on a hoodie or tote bag feels intentional and high-quality. It’s not a sloppy design; it’s a deliberate aesthetic. That builds buyer confidence. For personalized gifts, the arrow works especially well for teens, gamers, programmers, and anyone who loves a digital vibe.
Practical Embroidery Designer Notes
- Test on scrap fabric first. I can’t stress this enough. The glitch effect is sensitive to fabric type, stabilizer choice, and thread density. Run a test before committing to a production run.
- Check thread color contrast. Use the lightest or brightest thread on dark fabrics, and a dark thread on light fabrics. Metallic or neon threads amplify the digital feel.
- Review stitch density. With Big Glitch Arrow 3, you want the fills to be dense enough to cover the fabric but not so dense that they shrink the surrounding fabric. Aim for a density around 4–5 mm per fill for most home machines.
- Confirm hoop size. Measure the maximum width of the arrow in your digitizing software. If it’s wider than your hoop, you’ll need to scale it down or split it into multiple hoops (not recommended for this design).
- Inspect small details. The tiny glitch fragments may be too small for some machines. If a fragment is less than 2 mm wide, consider removing it or merging it with a neighbor to avoid thread breaks.
- Test in black and white mockups first. Viewing the design in grayscale helps you see which areas might read as gaps versus solid shapes. This is especially useful for printable mockups or preview images in your Etsy shop.
- Compare light and dark fabric backgrounds. The same design looks dramatically different on white versus black. Take photos of both to help your customers choose.
- Use proper stabilizer. For most applications, a medium-weight cutaway stabilizer is ideal. For stretchy fabrics, add a layer of water-soluble topping to keep the glitch lines crisp.
- Check licensing before selling. Since Big Glitch Arrow 3 is a Graphics product from the Crafts category, you likely have the right to use it for personal and small commercial projects. But read the license terms carefully—some graphics prohibit reselling the digital file or using it on mass-produced items. If you’re an Etsy seller creating finished products, confirm that you can use it commercially. If you plan to sell the embroidery file itself, you may need additional permissions or a separate license.
Final Thoughts for Creative Entrepreneurs
Big Glitch Arrow 3 is not a universal design. It won’t work for every product or every customer. But for makers who target a modern, tech-savvy audience, it’s a goldmine. The glitch theme is still strong in fashion and branding, and this arrow is versatile enough to adapt to sweatshirts, tote bags, hats, patches, and even home decor. As with any design asset, your success depends on how you execute it. Take the time to digitize it with care, test it on your chosen fabric, and present it clearly in your product photos.
If you’re a small shop owner looking for a graphic that breaks away from flowers and script fonts, give this arrow a try. It’s bold, it’s honest about its digital roots, and it makes a statement. Just remember: the glitch is the feature, not a flaw. Let it shine.